 Here's a simple way to clean the CPU ... and as much as I use the terms that we can understand all because these tips in dedicated for beginners like me :
1. Unplug all cables connected to the CPU. either the power cord or cables from devices / other devices (keyboard, mouse, monitor, printer, etc.)
2. Open the CPU casing (open ways depending on the type and model of each casing)
3. Remove the components contained in the CPU. To facilitate removing the components, just lay our CPU.
- Power off the Suplay. Loose once all the cables are connected from the power supply to other parts such as the motherboard, VGA card, DVD rom, and hard disks. When we are afraid of forgetting can be recorded or photographed all the locations of early cord stuck. Screws and remove the power supply which usually rear casing plasticity of the CPU.
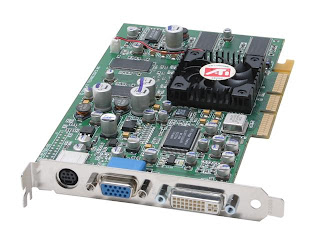
- Next step .. we loose RAM, hard disk, VGA card (if any), ROM, floppy.
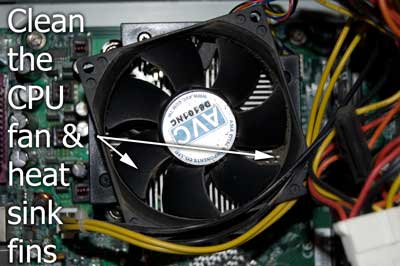
- If you feel able to .. and sure can .. we're off the heatsink as well (you know the iron is no fan of small) but rather complicated and brinkmanship know ya (ya suitable for sports enthusiasts heart ..... hahahaha). If not sure can, enlist the help of someone more expert only. but still consider how to take it off, so that next time we can remove the heatsink itself.
- After successfully removing the heatsink, remove the processor as well. This one should be extremely careful at all!! Again, if not sure can, enlist the help of someone more expert only.
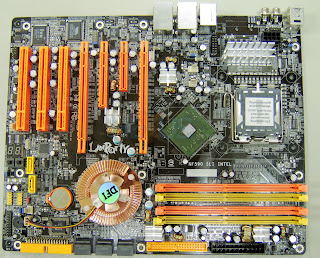
- Remove the motherboard from the CPU casing. no removable motherboard also does nothing.
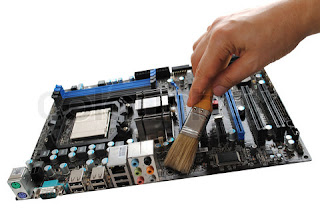
4. Stages of cleaning. just use a small brush (but yeah not very small), the blower if it has. Do not use any liquid to clean all components of the CPU.
- Power supply, ROM and Floppy adequately cleaned using a brush so that the dust that stuck to disappear.
- RAM and VGA card : remove dust with a brush. Note that the component legs golden. if the color is muddy or not shiny, immediately rub with a pencil eraser.
- Heatsink : clean it with a brush. if possible, separate the metal heatsink and fan that optimal cleaning results.
- Processor : clean it with a brush. former usually crust over the processor. it is the thermal paste (pasta) which dries. wipe gently and full of love using a flat tip screwdriver or other tool. remember! should be filled with love .....
- Motherboard: clean the dust with a brush slowly. do not miss the sidelines For RAM slot connector. VGA card, etc.
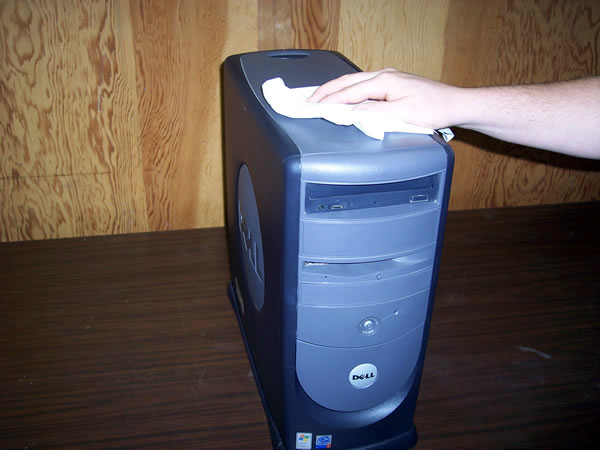
- Lastly, clean the CPU casing
5. Assembly stage again
- Put the motherboard back in the case when the earlier released.
- Put the processor on the motherboard, but before apply thermal paste thinly and evenly on the surface to be in contact with the heatsink. If the processor can not be installed properly should not be forced because of possible mounting positions processor inverted / wrong. note the tip-end procesesor elbow.
- Combine back iron heatsink and fan. after it gave enough thermal paste on the heatsink surface that will be in direct contact with the processor and install the heatsink on the motherboard. Do not forget also to install the fan on the motherboard cable.

- Put Ram. In the RAM slots there is a divider / small bulkhead that divides the slot into 2 or 3 sections. note the bulkhead. if inverted installing RAM, automatic RAM will not be installed in the slot. if it is correct RAM mounting position, press both ends of the RAM so RAM is installed in the slot and locks automatically.

- Replace the PSU (power supply unit). Attach the cable that was originally connected to the motherboard.

- Attach a VGA card in the slot. do not forget to plug the cable power on if there is special plugs. latest VGA cards usually have the plugs.
- Put the hard disk and DVD Rom. Connect the power cable from the power supply, also the data cable to the motherboard.

- Cap back CPU casing and attach all the wires that were originally connected to the CPU, such as power cable, keyboard, mouse, monitor.
6. Turn on your CPU.
Well good luck ....(^ _ ^)
No comments:
Post a Comment